Showing posts with label Homesteading. Show all posts

Tuesday, February 21, 2017

Has spring sprung?

I certainly hope so! I’ve begun my gardens on my new homestead. Not a lot planted yet, but the ground is broken in some places and a few early crops have been planted.

I’ve also put seeds in starter trays in my portable greenhouse. They haven’t sprouted yet. I always get nervous until I see the first baby green leaves coming out of the soil! I put lettuce, two kinds of tomatoes, spaghetti squash, cucumbers, watermelon, and pie pumpkin seeds in them. I do still have some of all of these seeds left if it turns out I need to replant them.

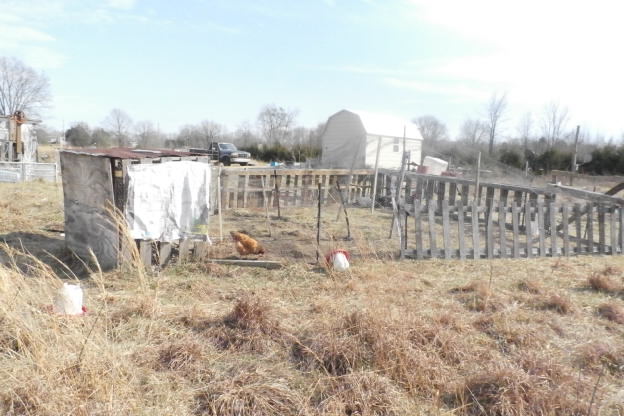
We built a new chicken run to attach to the previous small one. This will keep the chickens from eating the seeds and tender new plants in the garden areas. We’ve tilled up a very nice spot for potatoes, and will continue tilling other locations for more gardens.


I was able to move 3 of my old raised beds to the new homestead, so I’ve started them over again as well. I put cardboard on the ground under them to block weeds. (Most of the grass here is fescue or bermuda grass.) I put a mixture of topsoil, peat humus, and composted manure into one bed to get a bit quicker start on it. I hope I can dig up other soil from the property, but I needed a “quick fix” for this first bed. In it, I planted some green peas, mixed lettuce, and mixed radishes. I didn’t fill the bed with these veggies, so I’ve got room to add a few other things to it.



We’ve been getting the goats out and putting them on tethers to eat down the proposed garden areas. It works out very well all around. I get a cleared garden spot with bonus fertilizer and they get full tummies of grass.

The small tiller, various garden tools, and fertilizers and soils were all from my late brother-in-law’s collection of garden tools and amendments. Sis let me have them since she doesn’t garden. (In her words, “I don’t garden and you can’t make me!” lol) Her late husband was a Master Gardener and wound up with a large array of tools, books, and soils/fertilizers.

As we tilled the proposed potato patch, we also dug out the larger clumps of fescue grass. While fescue is excellent for pastures (where we live, it will grow even in the winter), it clumps up pretty big as it grows, sometimes making walking over the field difficult due to stumbling! Those clumps, some large enough to fill a 2 gallon bucket, are being tossed over into the pig pen and chicken yard where the pigs and chickens are enjoying eating them, rooting in them, and scratching them apart.

Along with veggies, of course, there will be flowers. I was very pleased to find that some previous resident had planted loads of daffodills in the past, but they were in a very unlikely location – in the center of a bunch of privet hedges! So, we’ve been busy digging them out and moving them to places where we can enjoy them much more, such as a row of them in front of the cabin. There’s still more to move, but I have planned where I want them around the perimeter of the yard, to define it.

I also brought my daylilies, regular lilies, violets, irises, and butterfly weed with me and got all those planted out in a bed at the front edge of the front yard. All these flowers are beautiful and pretty well native varieties, but the daylilies and violets are also edible! Along with these I moved things like monkey grass and purple wood sorrel, which are still in pots but will be planted over the next few days.

None of my herbs except rosemary survived the move, and even the rosemary is looking pretty sick. The buck goat we had got loose and had a “fight” with it, knocking it down, scruffing it badly, and even breaking some branches off. I’m hoping it make a strong comeback this summer. Last summer and fall, it did seem to be growing.

I also brought over the Jerusalem Artichokes, and we recently added some, fried up like fried potatoes, to a meal. They were excellent so I hope they really do well. I want to try pickling them and also making relish from them! They never did bloom last fall so I’ll leave the rest of them alone to see if they take off again. I had uprooted them for the move last summer after they’d already started growing, so that set them back a lot.

Now, tell me what you’re doing or planning for this spring!

Thursday, January 12, 2017

Winter! No Spring! No winter again!

What a roller coaster ride the weather has been. We had temperatures in the 70s, then we had days of snow. Overnight lows went down to about 10 on a couple of nights, now it’s back up to the 60s again.


A friend in the weather business said we should watch for flash flooding for the next few days, while those in the north part of the state could see ice and snow!

We did finally get a propane heater installed and it helps, but without insulation, it’s not a huge help. At least we weren’t freezing during the first round of low temps for the year. However, we ran out of propane last Saturday night, just in time for the next round, and couldn’t get the tank filled on Sunday.

See, we normally take the tanks to a local hardware store where they have a bulk tank to refill from. We did trade in our smaller tank (a grill tank) for one like it at a local grocery store. However, I don’t think there’s as much propane in those you see in the racks outside of stores as what we get when we get one refilled. And, the cost is considerably higher. But we needed something to at least be able to cook on those really frigid days.

I’ve sold a couple of things to keep propane in the heater and stove. The money will also help keep a generator running. Oh, I forgot to tell you the generator news, but I’ll do that in another blog post.

Anyway, I have a turkey to can and now we’re not having enough sunlight to charge the well pump battery. (I need the water for inside the canner and to make broth for canning.) This just means we’ll need to charge it up from the truck, so I can pump water and get some canning done before it all goes bad.

I did get some veggies canned that were on sale very cheap at the local grocery store, at least, so now we have a little more variety on the plate. Canning them got us 5 pints of corn, 3 pints of green peas, and 10 pints of green beans for an average of 40-cents per pint. Less than the cost of buying these same vegetables in cans.


Sorry it’s been so long since I posted here. It seems like one thing after another has happened. Nothing terrible; just stuff.


Wednesday, December 14, 2016

Winter woes off grid

We are expecting very bad weather, including frozen precipitation, over the weekend. It’s past time to really “batten down the hatches” and get better prepared. But, you know how it is. Every month I’ve planned to include a better heat source and some insulation, but every month other expenses take the money. December is no exception and I’m pretty well broke till the first of January. Hoping to sell the older three baby pigs to have some money to get gas for the generator and propane for the stove.

I’m on my last propane tank now, which is a 30 pound one. Not sure how long that will last since I’ve resorted to using the RV stove for some heat. I do have the kitchen window raised about 2 or 3 inches, but I’m pretty sure there are probably enough air leaks in the cabin to actually not need that!

The next two days will be spend trying to at least add plastic moisture/vapor barrier to the inside of the cabin walls. And it looks like we’ll be stapling nothing more than cardboard over that. It’s really getting cold inside and there’s a lot of condensation forming on the inside of the metal walls.

Also, my oldest son has given me a gas heater. One of those infrared kind. Anyway, turns out it’s for natural gas only and I have propane, so I’ve contacted a person who is very knowledgeable about such things to see what he thinks about converting it. We might not be able to do so, and if no, then I’ll just give the heater back to my son. Maybe he can sell it to someone.

I do have a large kerosene heater, but I’m now out of kerosene. Around here, the cheapest I can find is $4.80 a gallon from the bulk plant about 25 miles away. Next is $7 a gallon at a much closer place, so we need to figure if the gas used in driving actually makes the bulk plant price economical, or if just buying it by the jug at $7 per will actually be cheaper on us.

Last night our solar power also ran down really fast. Probably due to being so heavily overcast all day. It’s somewhat brighter today so I hope it builds up some power. Same for the well pump solar. It stopped pumping not long after sundown but in all honesty, I had used the water a lot yesterday which I’m sure ran it’s battery down pretty low. We will probably charge the battery off the truck battery with jumper cables to bring it up high enough to absorb some power as the day goes by and be useful later.

Yeah, I like being off grid but there are also downfalls to it. You learn new skills all the time for how to repair things, how to make do, how to protect livestock, inexpensive feed solutions, and more!

So, here’s the video I made in the dark last night while cooking supper!


Sunday, November 6, 2016

How to make salmon hash

The name of the recipe almost explains what you’ll make. But, just in case, here’s how we made a delicious Salmon Hash one night with inexpensive ingredients we had on hand.

Salmon Hash
  • 1 tall can pink salmon, large bones removed and liquid reserved
  • 3 baked potatoes with the skin on, cubed
  • 1 medium onion, sliced thin
  • Schmaltz, butter, or your favorite oil
  • 1 teaspoon dried thyme
  • 2 teaspoons crushed red pepper
  • 1 tablespoon lemon juice
  • Salt & pepper to taste
  • 4 to 6 whole eggs (depends on how many you’re feeding)


Using a fork, break up the salmon.


Melt fat in an iron skillet, or other skillet you may have.


Sauté onions just till translucent.


Add cubed potatoes, salmon, seasonings, and lemon juice.


Stir all together well.


When everything is heated through nicely, break your eggs onto the top of the hash.


Put a lid on the skillet and allow to cook about 5 minutes or until eggs are done to your liking.


Make a gravy from the reserved liquid plus enough water to make 2 cups.

Gravy
  • 2 tablespoons schmaltz or your favorite fat
  • 3 tablespoons flour
  • 2 cups liquid, which includes the broth from the canned fish
Melt the fat and stir in the flour. Allow to cook without browning for about 2 minutes. Stir in the liquid. Keep stirring until it’s thick and bubbly. Serve over the salmon hash.


Serve with sides of your choice. We chose pork & beans and homemade bread. Also put homemade chili sauce on top.


And, of course, I uploaded a video to YouTube for your viewing pleasure. :)


Hope you enjoy it as much as we did!

How to cook meatloaf in a pressure cooker

For this recipe, I actually did use a pressure cooker with the gasket and weight in place. It turned out moist and delicious this way. No more dry meatloaf!

Pressure Cooker Meatloaf
  • 1 1/2 pounds ground meat (your choice; I used beef)
  • 1/2 cup oats, cracker crumbs, or binder of your choice
  • 1 tablespoon Worcestershire sauce
  • 1 egg, lightly beaten
  • 1 onion, finely minced
  • 1 can of any type canned tomatoes, well drained and pressed out. Keep the juice! (I used Italian seasoned.)
  • Salt & pepper and other seasonings to your taste
Here are pictures of the ingredients I used:


Mix all ingredients well, kneading it all together with your hands. Place in small loaf pan and push the meat mixture a little away from the sides of the pan. Place the loaf pan into a round cake pan to catch any drips and overflow.

Place two layers of canning rings into the bottom of your cooker, then the rack. Put the meatloaf into the canner as well centered as possible. 

Add water until it touches the rack.

This is very important for the cooking process and to prevent your cooker from warping.
Put on the lid and put the 10 pound weight on the vent pipe. You don’t have to do a 10 minute vent for a cooker like you do for a canner. Bring it up to 10 pounds pressure and cook about 20 to 25 minutes. Once it reaches pressure you can turn the heat down to maintain it. If your cooker has another option for the weight, just use the larger weight if needed.

When done, let the pressure drop naturally while you make a gravy topping out of the reserved tomato juice and either water or broth. I used a packaged brown gravy mix but you can make your own recipe for gravy. Using the tomato juice is the key to a gravy that tops the meatloaf very nicely with a good taste.


And here's a video I posted to YouTube that might make it easier to understand!


Enjoy your meatloaf and let me know if you tried this!

Saturday, November 5, 2016

How to make potato soup

This is probably one of my all-time favorite soups to make. I’m pretty sure it ties right up there at the top with homemade chicken noodle soup. And it’s so easy to make. It takes few ingredients and a short amount of time to have a delicious, soul-warming soup to put on the table. Serve with biscuits, cheese and crackers, or oyster crackers.

Potato Soup
  • 3 medium to large potatoes, peeled and cut into about 1/2 inch cubes
  • 1 medium onion, finely chopped
  • 1 pint homemade or 1 can store bought chicken broth
  • 2 cups water
  • 1 can cream of celery soup
  • Salt and pepper to taste
  • 2 tablespoons schmaltz, butter, or oil for sautéing the onions
  • 1/2 cup cheese, optional but good! (I used store bought white American queso)
Sauté onions in the fat of your choice. I like schmaltz I rendered from chicken fat, but any nice tasting fat will do. Sauté just till they start to turn translucent but not brown.


Add your cubed potatoes and the broth and water. Add salt and pepper. Bring to a boil, then turn down heat and let simmer until potatoes are tender.


Add in the cream of celery soup. Stir it in well till all lumps are blended in. Bring it to a simmer.


Add the cheese of your choice.


Serve piping hot with crackers or biscuits.


Here's a video I did demonstrating the potato soup I made!


How to make biscuits in a pressure cooker

No, you don’t pressure cook them. You use a pressure cooker only as a stove top oven. Just like I did for the bread, I also made biscuits in an old, rather large pressure cooker that doesn’t have a gasket, a weight, or even an over-pressure safety plug anymore. If yours has all those things, just remove the gasket and leave the weight off for baking. Then, follow what I do. It doesn’t warp the cooker bottom using the dry heat because it’s not under pressure when you do this.


You can use store bought canned biscuits if you prefer. A can of those fits very nicely in an 8 inch round cake pan. I bought some disposable aluminum ones because my only round cake pan is 9 inch, so it’s really too large to go down in the cooker very well.

Here’s my biscuit recipe, more or less. You know how it is when you do things homemade. After awhile you do them by feel more than strict measurements, but this will work.

Homemade Biscuits
  • 3 cups self rising flour (or 3 cups flour, 3 teaspoons baking powder, 1/2 teaspoon salt)
  • 1 tablespoon sugar (optional)
  • 1/3 cup shortening
  • Milk to make stiff dough (Even better with buttermilk! If you use buttermilk, add 1/2 teaspoon of baking soda to the dry mix.)
Mix the sugar into the flour mixture (if you use sugar), then cut in the shortening with a pastry blender, two knives, a fork, or your hands. Slowly add milk until you get a rather stiff dough.


Turn dough out on a well floured surface and pat it out to about 3/4 inch thick. You can use your clean counter top, a cutting board, or a smooth kitchen towel dedicated to baking only. (I keep mine in a gallon zip bag.)


Do not knead the dough!
 
Cut out biscuits with a biscuit cutter. I actually use an old tomato sauce can that I’ve popped holes in the bottom. I’ve had it for many years and it’s exactly 1 cup for measuring flour plus it cuts out nice sized biscuits. The holes in the bottom let air escape so the biscuits don’t get stuck in the can due to a vacuum.


Gently place the cut biscuits into your baking pan. You may be able to push the remaining dough together and cut more biscuits until you’ve got it all used up.(Waste not, want not!)  Lower the pan into your pressure cooker that has a couple of layers of canning rings or something else to raise the pan off the direct heat of the bottom.

Turn on the heat to medium high, put the lid on the pan, and let it bake about 20 to 25 minutes. Check on things around the 20 minute mark to see if they’re getting done.

When the bottoms are golden brown, take the baking pan out of the cooker, flip the biscuits over on a plate, then slide them back into the baking pan to finish browning. That will take about another 5 or 10 minutes. (I did try flipping them with tongs but I found that I wrecked the biscuits too much doing that. Now I just flip the whole thing out as described above.)

When done, turn them out onto a plate and enjoy warm with butter and jelly, or with your meal.


Here’s a little video to help you see what I was doing with the pan.


Of course, these biscuits can also be baked in a conventional oven. Preheat to 400*F and bake them off till the tops are light golden brown.

Comment and let me know if you made these and how they turned out for you!