Showing posts with label Canning. Show all posts

Friday, October 13, 2017

Maypop (passion fruit) jelly

Hello everyone! I wanted to share my latest canning adventure with you. I made maypop jelly today! I followed a blog post, for the most part, which I will share below. I did find that I needed more water than called for and wound up using about 3 cups of water per batch for boiling the fruit.

But, what's a maypop, you say? Well, it's also known as Passion Fruit and it's the fruit of the passiflora incarnata vine. It's sweet and tart at the same time inside. You don't eat the tough, leathery outsides. The inner portion is filled with crunchy seeds with a lemony "jelly" surrounding them.


Ripe maypops (so called because they "may pop when you step on them!) Those are ugly fruits but so yummy on the inside! These are some we foraged from a friend's farm.


This bloom was white but most often you'll see purple ones. Isn't it beautiful?


See the seeds and gelatin that surround them?


To make the jelly, you need to cut up enough of the fruit to make 2 cups, pressed into the measuring cup. Put it into a pan with 3 cups of water and boil it for 5 minutes. Then strain out the pulp and reserve the liquid.


Press the juice out with the back of a spoon or ladle, or set a large heavy cup on it to press out even more juice.


Here's the juice in the pot (pardon the ugliness of the pot) and ready for the powdered pectin.


Then, put the liquid in a tall pot (should have 3 cups of liquid total), add powdered regular pectin (a full package for this recipe), and bring it to a boil. When it's boiling add 3 1/2 cups sugar all at once. Stir and continue stirring until it comes to a hard, rolling boil, then boil and stir for 2 minutes.


Turn off the heat and let it settle down about 5 minutes. Skim off any foam. Ladle into hot half-pint or pint jars; process in boiling water bath for 10 minutes. (I use a steam canner but the timing is the same.) Wait 5 minutes after turning off the heat when the time is up, then remove the jars from the canner. I actually made 3 batches but the first batch only made one jar following the directions on the blog I'll link you to.


And here's the blog I mentioned! Give her a visit and let her know I sent you! PeppySis: MayPops Jelly

I will have a video for this in a few days and will add it here. :)

Friday, November 4, 2016

How to prep and can sweet potatoes

We love canned sweet potatoes and because we live in the South, we can get them at a very good price around August or September every year. I buy 2 of the 40# boxes each year so I’ll have plenty for over the winter. We like them baked, fried, as part of calico potatoes, and canned to use as a side dish or make sweet potato pies.

Getting them peeled and ready to can, though, is hard work. The USDA recommendation is to wash them and boil them whole for about 15 minutes, then peel them. I used to do that before we moved off grid, but bringing in water several times to wash them, boil them, then drain them and get them hot again, then make a syrup to can them in is more difficult now. So, I changed my tactics. I do still wash them, but then I peel them right away. I can use a lot less water in washing them, then I can cut them up and put them all in one big pot for parboiling. I parboil them about 7 to 10 minutes.

Here is my step-by-step of prepping sweet potatoes for canning. I do follow the pressure canning time and pressure guidelines from the USDA.

I use an apple peeler with the corer/slicer part pushed out of the way. This goes much faster and I only have to do a little trimming.


After trimming, I can cut them into chunks that will go into the jars. For this time I wanted to use regular mouth pint jars so they needed to be small enough to fit in there.


The directions called for 11 pounds of potatoes for 9 pints of canned potatoes. I’m pretty sure now that they meant UNpeeled potatoes because I wound up with at least twice the amount needed for one canner load. I double stacked them in the canner so there were 18 pints, but I was able to fill the canner twice like that!


I brought them to a boil and boiled them for about 10 minutes to get them hot throughout and to start them getting somewhat soft. The recommended canning time was developed using only hot, parboiled sweet potatoes. It was not developed using raw sweet potatoes.


I put them into hot jars, added a tablespoon of sugar and a 1/2 teaspoon of salt to each jar, then poured boiling water over them. (Both the sugar and salt are for flavor only and have nothing to do with safe preserving.) I removed the air bubbles, wiped the rims well, and put on hot lids and rings. I did this one jar at a time. As each jar was filled, I placed it back into the pressure canner where the other jars were heating up. I had jars for the top layer heated with boiling water in them set aside.

When the bottom layer was filled, I put in another rack and put more jars in the top layer. Then I put the canner lid on, tightened it down, brought up the heat, let it vent for 10 minutes after it had a full and steady stream of steam, tightened the regulator, brought it up to pressure, then processed the pints of sweet potatoes for 65 minutes.

This is the large canner I use to double stack pints or smaller.


From Potatoes, Sweet - Pieces or Whole -- Safely canning sweet potatoes


After they were done and the pressure in the canner had dropped fully to 0, I took the jars out and put them on towels on the counter to cool. I don’t touch them for at least 12 hours. Then I check the seals, remove the rings, wash the jars, and write the product and date on the lid with a sharpie. I store them stacked in my tiny pantry area inside milk crates and with cardboard between layers. Stacking jars is okay according to both Ball and the NCHFP. Here’s what NCHFP says about it.

"If jars are stacked in storage, be careful not to disturb vacuum seals. It would be a good idea to not stack jars too high directly on top of each other; one manufacturer recommends no more than two layers high. It would be best to provide support between the layers as a preventive measure against disturbing the seals on the lower jars. Jars could be placed in boxes to be stacked, or use some type of a firm solid material across the jars as a supportive layer in between them."

-- From Storing Home Canned Foods at the NCHFP (National Center for Home Food Preservation)

The end product: Beautiful and tasty home canned sweet potatoes.


Sunday, October 23, 2016

How to make and can your own sauerkraut

I just finished a fermenting project and I’m very pleased with how it came out. I made sauerkraut. I’ll be trying other ferments in the near future, but since we love kraut, felt this was a really good one to start with.

I began by shredding 3 heads of cabbage on a mandoline cutter. I probably had 8 or 9 pounds of cabbage. (Be sure to reserve a few whole cabbage leaves. You’ll see why later.) You could use a sharp knife or a food processing to achieve the same results. The shreds are thin but not super thin like angel hair coleslaw. Then I mixed in 5 tablespoons of pickling/canning salt with my hands, massaging the shredded cabbage to bruise and break it up, and get the salt mixed all through. This is an important step because it starts the cabbage juices flowing, which is what you need in the kraut.


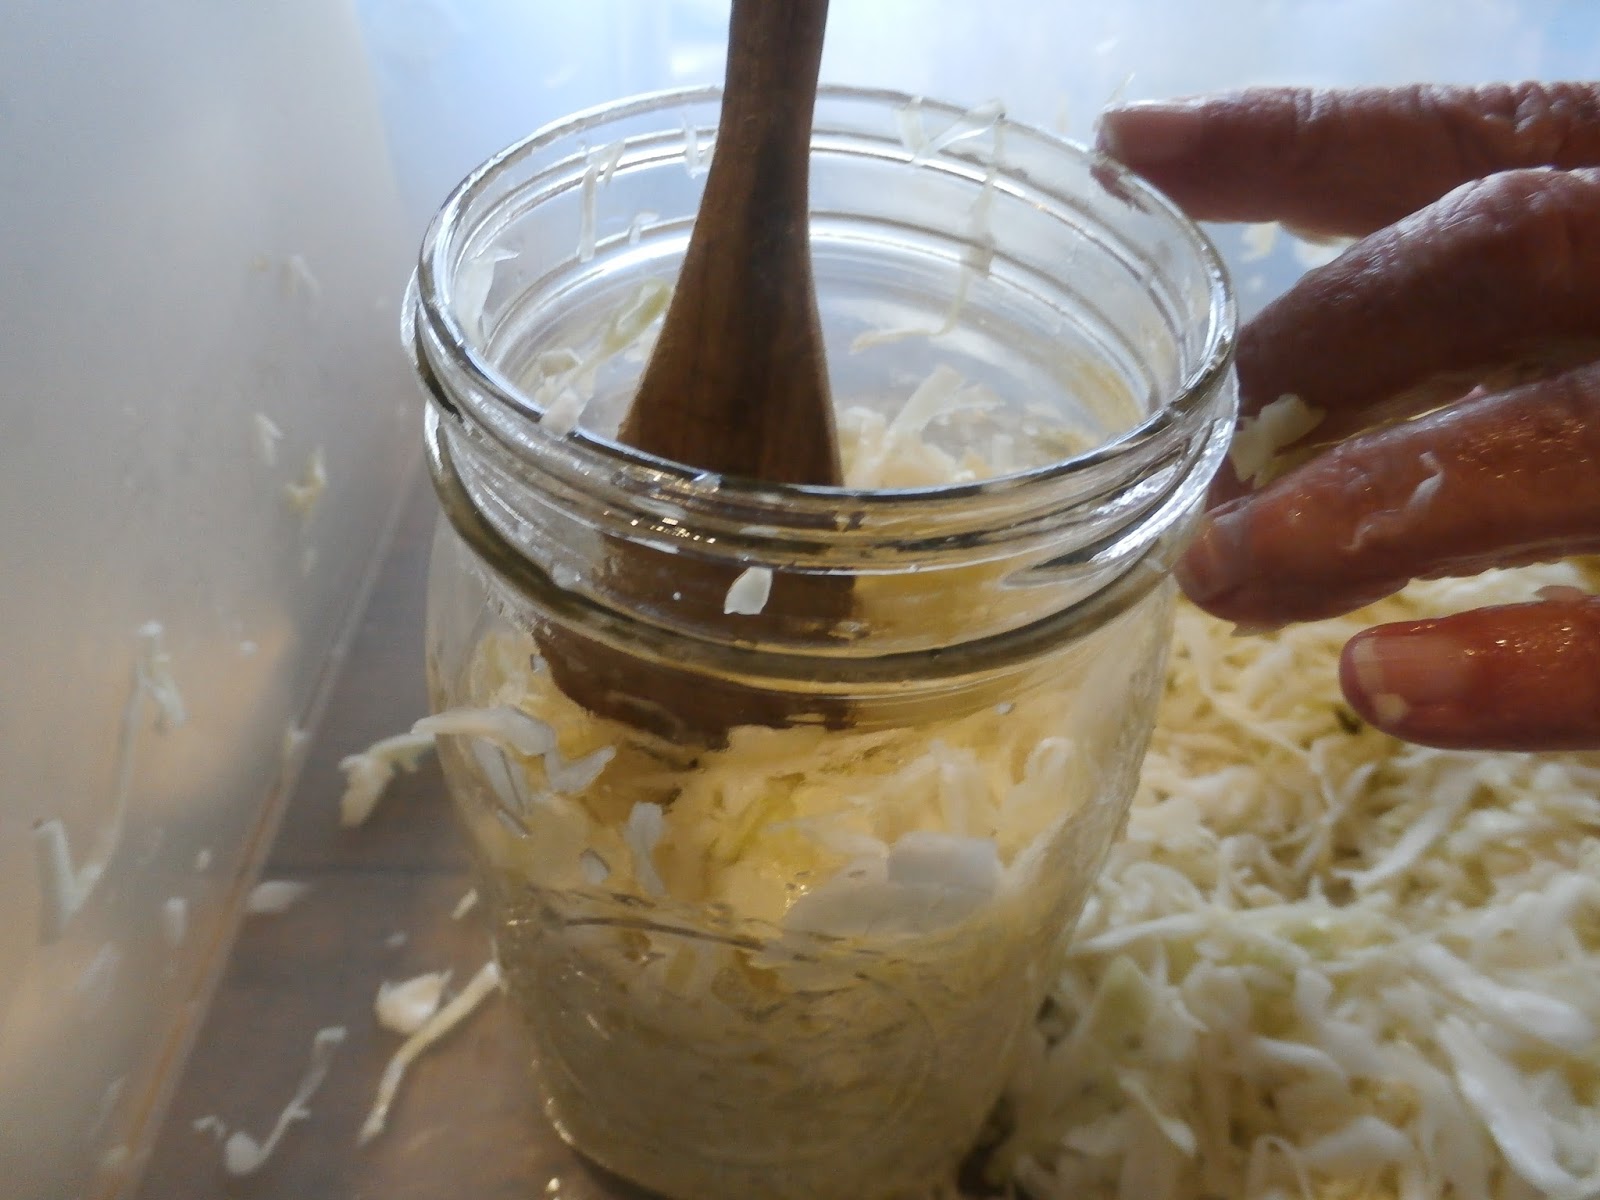
Next I put it into quart wide-mouth mason jars and tamped it down really well with a wooden spoon. This further bruises the cabbage and creates even more juice. I was amazed at how much juice came out in just a few minutes of this! I packed and packed it to about 3/4 full in the jars. Then, I carefully placed the whole cabbage leaves, torn to fit, on top of the shredded cabbage. I tucked it in around the edges and pushed it down well so that the liquid was coming over the leaves.


The next step was to weight the cabbage down. I did this by filling half pint jelly jars with brine, putting on used lids and rings, and pushing them down onto the cabbage leaves. I put the 4 quarts of future kraut in a cake pan, took it to my closet, and set it in the floor of my closet, which is the coolest spot in the house. I covered it with a thick bath towel.


Waiting is the hardest part. I checked the kraut every day or so to make sure it was fermenting and not molding and to skim off any scum, which is actually kahm yeast. If mold had formed, I would have thrown it all out because mold is dangerous. The white scum of kham yeast, however, is not.
If the liquid begins to look like it’s not covering all the cabbage, then add more brine made from 1 quart of water and 1 1/2 tablespoons of salt. Stir until salt dissolves. Bring this mixture to a boil and remove from heat. Let it cool to room temperature before you add it to your kraut. You can store this in a jar to use anytime during the process. I made it while I was prepping the kraut and kept it on hand, but wound up not needing it for mine.


I began the ferment on September 27, 2016, and I was done on October 19, 2016. I could have left it longer but it had reached the degree of flavor we like. Not crazy sour or salty at all. Just a mild kraut flavor which is yummy eaten raw or cooked. You will want to ferment it from 2 to 6 weeks, depending on how you like the flavor. Just taste test it to see


I reserved some out for our dinner (of course!) then canned the rest. I got 5 pints of lovely homemade sauerkraut. Now, I know if you cook or can it, you destroy the probiotics. However, I’m in a situation where I need to store it in a shelf stable manner and for us, this means canning it. It’s only a 15 minute water bath for pints and I have 5 future meals on the shelf! If you have room in your refrigerator, this will store safely without canning it for many months.


Here are pictures of the kraut after it finished fermenting and in the pot to be simmered before canning. (Notice that the liquid level is very good over the kraut in the jars before canning.) I removed the large leaves that covered the kraut and discarded them.


Tada! 5 beautiful pints of homemade kraut fresh out of the water bath canner!


You can watch my video of canning the kraut here:


I cooked the reserved part up with some home canned, home smoked pork, and served it with boiled sweet potatoes, buttered and toasted rye bread, and pork n beans.


I will definitely be making kraut again!!

Tuesday, May 31, 2016

The Homestead Cheapskate: Eggy supper from frozen eggs

I still have eggs in my freezer from late last summer, so I’m trying to use them up before we move. I probably have another 2 dozen to go, but today I made a sort of pizza flavored self-crusting quiche with 6 of them.

If you freeze eggs, you will need to plan a day ahead to use them since they need to thaw in the fridge. Trying to quick-thaw them just means you wind up cooking them!

Last year, I bought some small portion cups with lids. Each cup holds one whole egg. I washed the eggs (remember, they were fresh from the hen house), then cracked each one into a portion cup. Then, I added a pinch of salt and gently stirred them just enough to break the yolk but not enough to incorporate air. Air in them will make them freezer burn faster. I stacked them in the freezer, level, until they froze solid. If I remember right, the cups were 2 ounces each.


Recently, I’ve been working on using them up in as many ways as possible. They aren’t suitable for fried eggs, but they are ok for scrambled eggs or for using in recipes.

My “quiche” recipe is pretty basic and simple:
  • 1/2 cup plain flour
  • 1 tablespoon baking powder
  • 1/2 teaspoon salt
  • 1/4 cup oil
  • 6 eggs, mixed together
  • 1 cup milk
Mix all together well and add other ingredients you like or are trying to use up, such as chopped or shredded cheese, chopped onions, chopped bell pepper, spinach or other greens, bacon/sausage if you want, herbs, seasonings. It’s really up to you. I don’t go over about 2 cups total of extra ingredients.

For today’s supper, I used a bit over a cup of canned diced tomatoes that were in the fridge, some fresh oregano and rosemary I chopped up, about a half cup of cheddar cheese I sliced thin, and some garlic powder. I mixed all that into the basic egg mixture, poured it into a well-greased skillet, and baked it at 350F for about 45 minutes. The top was bubbly and a knife inserted in the center came out clean. It won’t get a real pie crust on it, but the bottom and up the sides a bit will be crusty.
I served this with Parmesan cheese and home canned salsa.


With just Parmesan cheese.


With home canned salsa on top.


It turned out very good with a pizza-like flavor and aroma. Mozzarella cheese over the top of it would have really been awesome, but I forgot to get that out of the freezer.

If you make this, let me know how you did yours!

Friday, March 18, 2016

The Homestead Cheapskate - Part 2 Food preservation

In the midst of everything else that's going on (see my previous post), I still need to take care of the everyday things. One of those things is food preservation. And my favorite method of preserving food is canning. Next, is dehydrating, but for this part of The Homestead Cheapskate, I'm dealing with canning, and doing it safely.

Because of the need to get the freezers emptied before we have to move, I am "binge canning" now. Today, I canned ground beef.

Now I'm going to tell you right from the get-go: I only use the safe tested methods from the USDA, Ball, Bernardin, and several university extension services that do the food safety testing. I don't play fast and loose with our health and canned foods can be extremely dangerous if you aren't following tested procedures and methods.

We did get one freezer emptied (and yes, there were some freezer burned things in there. Bad homesteader!), and I found things that could be canned up to further empty the other freezer. One of those things was a 10 pound chub of ground beef. I also have some beef patties that I'll be canning very soon, plus several packages of fruit that I'll can in light syrup in a few days.

The meats I'm canning were bought when a local store was having crazy low meat prices. I don't buy meat until they have those kinds of prices. I'm not a "weekly shopper" kind of person. I ONLY shop for groceries that are deeply discounted, on sale, or in season at very low prices. We are likely to bring home 30 pounds of chicken because it was on sale, but we might not get any other meat. I don't necessarily have a plan for the on-sale meat, but I know we'll use it. The 30 pounds of chicken? I got it for $1.99 for 10 pounds! I canned most of it. We ate a meal or two out of it. And I left out some chicken legs to put in the freezer for frying. 30 pounds of chicken will probably give us 40 meals. I build my meal plans around the things I have.

The 10 pounds of ground beef I canned today produced 13 pints, which translates into 13 meals for us. How will I use it? I'll use it in any recipe that calls for a pound of ground beef, I'll put it in soups or casseroles, I'll make tacos or burritos with it...lots of ways.

How did I can it? I followed the USDA recommendations for Canning Chopped or Ground Meat. It turns out perfectly, as you'll see in the video I made while canning it.


Saturday, March 12, 2016

Canning sweet potatoes

I actually canned a lot of sweet potatoes late last summer, when local growers had them right out of the field. They aren't beautiful sweet potatoes. In fact, a lot of people buy them for animal feed, and at the price, they'd be really good for that. However, in my little world, a sweet potato is a sweet potato and they all taste good.

I originally bought 120 lb. of sweet potatoes. You read that right -- 120 pounds! I canned up 40 lb. of them, shared at least 40 lb. with family members, then kept the last 40 lb. to use for baked and dehydrated sweet potatoes. Or for other fresh cooked recipes.

There's qute a process to canning them safely, but it's so worth the effort. You have sweet potatoes in jars, then, that are easy to just heat n eat for side dishes for meal, or you can make candied sweet potatoes really quickly with them. And now, I have enough sweet potatoes left to sprout slips and grow some in my own garden beds!

Here is how I canned them:


I hope this helps you in your canning adventures. If you ever can sweet potatoes at home, you'll wonder why you ever bought them canned from the store! Home canned ones taste so clean!

Wednesday, March 2, 2016

Canning Onion Soup

One of the things we do here on our mini-homestead is engage in food preservation. We can, freeze, and dehydrate just about anything we can get our hands on.

Last summer, I canned some Onion Soup, and videoed most of the process. I somehow neglected to video the last stage: Removing the jars from the canner. It's possible I did video that, too, but apparently I've forgotten where I filed it since it isn't filed with the rest of the clips!

I followed the USDA guidelines for canning soup, which can be found by following the link to Soups. There you will find a safe, tested method for canning soup. Of course, you can also explore the site for hundreds more recipes as well as help for canning and other food preservation, equipment, and safety concerns.

I've been canning many years, so I also use the Ball Blue Book. Some of us who can call it the "Canning Bible"! Loaded with great, safe information, clear instructions, and even planning charts for canning and gardening.

Since I thought some of you might like to follow along with me as I canned my onion soup, I made the videos into two parts.

Canning Onion Soup Part 1


Canning Onion Soup Part 2 & an Announcement.