Sunday, October 23, 2016

How to make and can your own sauerkraut

I just finished a fermenting project and I’m very pleased with how it came out. I made sauerkraut. I’ll be trying other ferments in the near future, but since we love kraut, felt this was a really good one to start with.

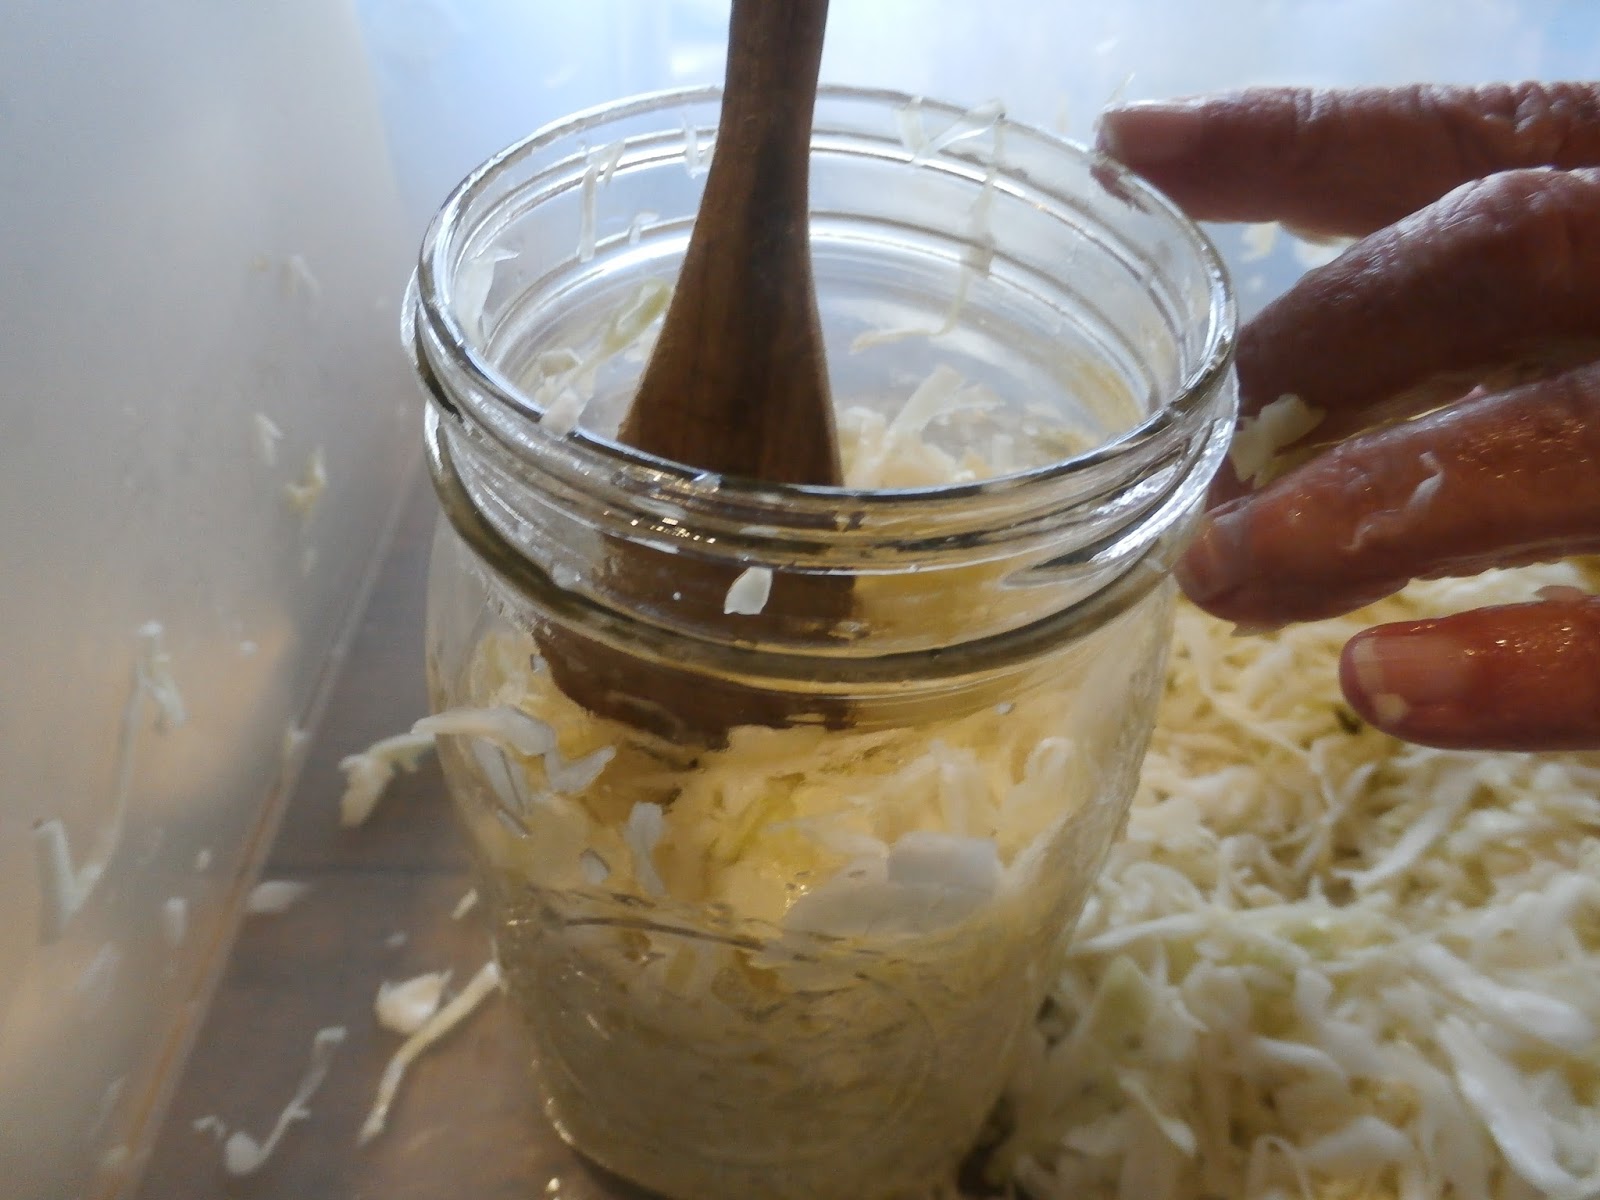
I began by shredding 3 heads of cabbage on a mandoline cutter. I probably had 8 or 9 pounds of cabbage. (Be sure to reserve a few whole cabbage leaves. You’ll see why later.) You could use a sharp knife or a food processing to achieve the same results. The shreds are thin but not super thin like angel hair coleslaw. Then I mixed in 5 tablespoons of pickling/canning salt with my hands, massaging the shredded cabbage to bruise and break it up, and get the salt mixed all through. This is an important step because it starts the cabbage juices flowing, which is what you need in the kraut.


Next I put it into quart wide-mouth mason jars and tamped it down really well with a wooden spoon. This further bruises the cabbage and creates even more juice. I was amazed at how much juice came out in just a few minutes of this! I packed and packed it to about 3/4 full in the jars. Then, I carefully placed the whole cabbage leaves, torn to fit, on top of the shredded cabbage. I tucked it in around the edges and pushed it down well so that the liquid was coming over the leaves.


The next step was to weight the cabbage down. I did this by filling half pint jelly jars with brine, putting on used lids and rings, and pushing them down onto the cabbage leaves. I put the 4 quarts of future kraut in a cake pan, took it to my closet, and set it in the floor of my closet, which is the coolest spot in the house. I covered it with a thick bath towel.


Waiting is the hardest part. I checked the kraut every day or so to make sure it was fermenting and not molding and to skim off any scum, which is actually kahm yeast. If mold had formed, I would have thrown it all out because mold is dangerous. The white scum of kham yeast, however, is not.
If the liquid begins to look like it’s not covering all the cabbage, then add more brine made from 1 quart of water and 1 1/2 tablespoons of salt. Stir until salt dissolves. Bring this mixture to a boil and remove from heat. Let it cool to room temperature before you add it to your kraut. You can store this in a jar to use anytime during the process. I made it while I was prepping the kraut and kept it on hand, but wound up not needing it for mine.


I began the ferment on September 27, 2016, and I was done on October 19, 2016. I could have left it longer but it had reached the degree of flavor we like. Not crazy sour or salty at all. Just a mild kraut flavor which is yummy eaten raw or cooked. You will want to ferment it from 2 to 6 weeks, depending on how you like the flavor. Just taste test it to see


I reserved some out for our dinner (of course!) then canned the rest. I got 5 pints of lovely homemade sauerkraut. Now, I know if you cook or can it, you destroy the probiotics. However, I’m in a situation where I need to store it in a shelf stable manner and for us, this means canning it. It’s only a 15 minute water bath for pints and I have 5 future meals on the shelf! If you have room in your refrigerator, this will store safely without canning it for many months.


Here are pictures of the kraut after it finished fermenting and in the pot to be simmered before canning. (Notice that the liquid level is very good over the kraut in the jars before canning.) I removed the large leaves that covered the kraut and discarded them.


Tada! 5 beautiful pints of homemade kraut fresh out of the water bath canner!


You can watch my video of canning the kraut here:


I cooked the reserved part up with some home canned, home smoked pork, and served it with boiled sweet potatoes, buttered and toasted rye bread, and pork n beans.


I will definitely be making kraut again!!

Saturday, October 22, 2016

How to tether goats safely

Because we have 3 acres, mostly pasture, and not much money right now for fencing it all in, we are tethering our goats so they can get plenty of grazing in. There’s a lot of fescue in the pasture. It tends to grow in large clumps that make it hard to walk out there or drive a mower or tractor. However, it grows in the winter, which makes it ideal for goat grazing, and they are loving it.

Along with the fescue, there are brier patches, lots of ragweed, privet, and sweet gum saplings that they love to much on. We do have a small fenced area for the does, but they have it mowed down to nubs now so we came up with a safe tethering idea for all of them.

We’ve had Mr. Stinky Buck tethered pretty much for the entire time. He’s quite an escape artist and can jump a 5 foot fence! He doesn’t go far when he gets out, but I can’t manage him because he’s so strong and when he’s in rut, he’s mean to me. So, we got an 80 lb sack of quick-crete, mixed it up and poured it in a bucket. Added a strong eye bolt pushed deep into the middle with just the eye sticking out, and let it cure for a few days. It slid right out of the bucket. We have a strong chain hooked to his collar and attached to the eye bolt with a strong screw-on link. Let me tell ya, he drags that thing all over but he can’t drag it at a run!

Anyway, we did something similar for the does. We used 2 of our 2-gallon buckets to make 2 anchors with eye bolt in them. One sack of the quick-crete divided between the two buckets was enough to keep them where we put them. They don’t drag their anchors. Got somewhat lighter weight chain for them (still not as light as a dog chain), screw links, and swivel hooks to attach to their collars. They learned very quickly how to not get the chain around their legs, how to maneuver with it on, and have had a good time eating lots of grass. They are gaining weight like crazy. Goats need more grazing and browse than feed to keep them healthy and happy, and to keep their rumen in good order.


We do keep a close eye on them, though, just in case they get their chains together. Now, the girls haven’t had any issues, but Mr. Stinky Buck drags himself over to them, since they are in heat, and gets everything in a mess. My son holds the buck while I free the does and get them put where they belong or, if it’s late in the day, put them back in their fenced area. Then, my son gets the buck untangles and takes him back where he belongs, near his shelter.

We have actually put the does, one at a time, near the buck. We’re hoping he does what nature intended and that in the middle or end of March, we have new babies on the ground. Yes, the chains get wrapped around each other, but careful monitoring means no one gets hurt or choked, and we are always present to make sure they’re ok. We never ever leave the does on their chains when we leave or even overnight. Goats are always looking for a way to kill themselves, so we do what we can to prevent that.

Friday, October 21, 2016

Feed sacks on the chicken coop!

You read that right. Feed sacks on the chicken coop. Now, these don’t still have feed in them, of course. I actually save empties to use for projects like this. I tack them up on the outside walls of the coop to help stop the cold wind and wet weather from getting to the chickens. It’s not a perfect solution but it does keep their coop dry, which means they are warmer.

I leave a bit of an opening at the top and bottom to allow for ventilation, but since the coop is south facing with solid wood on the top 2/3 of the south facing opening, and the north side is also solid wood with a way for us to open to check eggs, add water to the bucket, and let them out in the late afternoons, they do need some ventilation on the east and west sides. Their roost pole is up high enough so that the solid wood portions of the coop block wet weather from them and their nest box and water bucket are down low, next to the north wall, to keep them from pooping in it. It’s across the “room” from the roost pole.


We’ll also tack feed sacks and whatever else up to the hog house, add hay to the stalls, and keep those guys cozy. The goat shelters, though, need more substantial siding. Crazy goats will chew on plastic feed sacks! So, we’ll be putting up whatever scrap lumber, plywood, or hard plastic paneling we can find to keep the wind out of their shelters. Might even disassemble pallets to use for hard-siding the goat shelters.

Technorati Tags: ,

Thursday, October 20, 2016

Catching up!

I have been remiss in posting to my blog as I should, so I’ll spend the next few days trying to get everyone caught up.

It’s been busy here, trying to get the new homestead established enough before winter so that we and the animals can at least be somewhat comfortable. Being off grid means really making careful plans and doing some work that just won’t wait.

For instance, I have put away all my yarns, knitting, looming, and crocheting in order to get more food storage in place, get the animal shelters somewhat winterized, and get the water line in better shape (into a trench) to use it inside instead of doing everything outside. There will be plenty of decent days I can do dishes and laundry outside, but there will be plenty more where the temps just won’t allow it.

When November comes, we’ll be getting at least some insulation into the cabin and we’ll finish burying the water line and wrap it where it comes out of the ground. I’m sure the insulation won’t be all we need to have in here, but even a little is better than none! It will help not only with the cold in the winter but with the heat in the summer.

I’ve posted several videos about what we’re doing to get ready outside for winter weather. I’ll link those in future blog posts. In the meantime, we continue to strive to get the most out of this homestead that we can as we make plans for next year’s garden and orchard, additional fences for the livestock, and and expanded chicken run and coop for more chickens.

Technorati Tags: