Hello everyone! I wanted to share my latest canning adventure with you. I made maypop jelly today! I followed a blog post, for the most part, which I will share below. I did find that I needed more water than called for and wound up using about 3 cups of water per batch for boiling the fruit.
But, what's a maypop, you say? Well, it's also known as Passion Fruit and it's the fruit of the passiflora incarnata vine. It's sweet and tart at the same time inside. You don't eat the tough, leathery outsides. The inner portion is filled with crunchy seeds with a lemony "jelly" surrounding them.
Ripe maypops (so called because they "may pop when you step on them!) Those are ugly fruits but so yummy on the inside! These are some we foraged from a friend's farm.
This bloom was white but most often you'll see purple ones. Isn't it beautiful?
See the seeds and gelatin that surround them?
To make the jelly, you need to cut up enough of the fruit to make 2 cups, pressed into the measuring cup. Put it into a pan with 3 cups of water and boil it for 5 minutes. Then strain out the pulp and reserve the liquid.
Press the juice out with the back of a spoon or ladle, or set a large heavy cup on it to press out even more juice.
Here's the juice in the pot (pardon the ugliness of the pot) and ready for the powdered pectin.
Then, put the liquid in a tall pot (should have 3 cups of liquid total), add powdered regular pectin (a full package for this recipe), and bring it to a boil. When it's boiling add 3 1/2 cups sugar all at once. Stir and continue stirring until it comes to a hard, rolling boil, then boil and stir for 2 minutes.
Turn off the heat and let it settle down about 5 minutes. Skim off any foam. Ladle into hot half-pint or pint jars; process in boiling water bath for 10 minutes. (I use a steam canner but the timing is the same.) Wait 5 minutes after turning off the heat when the time is up, then remove the jars from the canner. I actually made 3 batches but the first batch only made one jar following the directions on the blog I'll link you to.
And here's the blog I mentioned! Give her a visit and let her know I sent you! PeppySis: MayPops Jelly
I will have a video for this in a few days and will add it here. :)
I had a couple of leftover baked sweet potatoes that I needed to do something with. I hate wasting food, so I thought I'd work up a recipe for sweet potato biscuits. They turned out more chewy than I normally make, but the texture really resembles English Muffins, so I think if I'd cut them differently and baked them on cornmeal, you wouldn't be able to tell the difference!
Here's the recipe I worked up:
Sweet Potato Biscuits
2 medium baked sweet potatoes, peeled and mashed
3 cups all purpose flour
3 1/2 tsp. baking powder
1 tsp. salt
1 1/2 cups milk
Mix together dry ingredients, then cut in the mashed sweet potatoes. Add milk a little at a time until you have a soft but not too sticky dough. Turn out on floured surface, pat the dough out, fold it over in half, repeating this move 4 times. Flatten to about 1/2 inch thick and cut with a biscuit cutter. Place on ungreased cookie sheet or in ungreased cake pan. Bake in preheated 400F oven for 20 minutes or until tops are cracked and biscuits spring back when touched. Brush with butter and serve hot.
Have you ever been called a cheapskate? I have, and I own that title!! I have some bread that isn't bad but it's going stale and dry. I hate throwing food away, so we looked for a tasty way to use it up, and found one. Baked French Toast.
I will say, as with almost any recipe I find, I wind up making it my own by tweaking it here and there and using ingredients I have on hand. That's what we did today, too. My son actually did all the work in making this yummy lunch treat.
In the meantime, here's the recipe we worked out.
Baked French Toast with Apple Pie Topping
Preheat oven to 350F
8 to 10 slices stale bread
4 large eggs
1 cup milk
3/4 tablespoon vanilla
1 pint of apple pie filling (You could also use a can of apple pie filling)
Lay the bread slices, overlapping slightly, in a well greased 9x13 baking pan or dish.
Mix the eggs, milk, and vanilla very well until light and frothy. Pour the mixture over the bread and let it soak a couple of minutes. Drop spoonfuls of the apple pie filling over the top and spread it out.
Cover with foil and slip into preheated oven for about 30 minutes. Remove foil and finish baking, another 30 minutes, or until lightly browned and toothpick test proves doneness.
Remove from oven. Let rest 10 minutes. Serve it warm on a plate with melted butter drizzled over or powdered sugar sprinkled on.
Here's a picture of the finished product, plated. It was super good. Like a cross between bread pudding and custard, with a hint of apple pie thrown in!
Last fall I canned up quite a few jars of cranberry sauce. I'd had the berries in the freezer and in anticipation of moving off-grid, I started canning everything in there. The sauce was one thing. However, I'm pretty sure I measured too much water into the pot of berries and sugar because every last jar of cranberry sauce was runny and soupy.
We've been eating it anyway, but I canned it in pints and we can't go through a pint before it goes bad. No real refrigeration, you know. (Next time I'll use half-pints.) Well, we had it with a "Thanksgiving" style meal the other night. Home canned chicken, gravy, stove top stuffing (don't judge - it was on sale, I had coupons, and it's tasty), and a few other homemade items. Still had about 3/4 of the pint left after dinner.
Today I decided I needed to do something different with the cranberry sauce, so I searched through the recipes on my computer and came up with a quick bread recipe to use. It was actually a pumpkin bread recipe, but after tweaking it a bit, the result is moist, delicious cranberry bread!
Sift together baking powder, spices, baking soda and flour. Beat
together other ingredients, then gradually add sifted ingredients.
Mix well. Bake one hour in greased loaf pan at 350 degrees or until
it tests done.
I would probably use about 1 1/2 cups of any wet syrupy fruit in this recipe. Let me know what you think if you make it!
We have wonderful wild blackberries growing right here on the homestead, and we are so grateful for them. We just have to beat the birds to them!
Well, today we did it. And we picked about a quart and a half of delicious, juicy, ripe blackberries. Purple fingers is only part of the reward for braving the thorns and brambles.
What a treasure! Of course, the first thing I did was make a blackberry cobbler from them. It was so yummy!
Here’s what I did:
After I washed the berries well, I sugared them with about 1 1/2 cups sugar, then covered them and let them macerate for about an hour to bring out all the beautiful juices.
Then I melted some buttery spread in a glass baking dish which is about 9 inches square.
Next, I mixed up my cobbler batter. This is nothing more than 1 1/2 cups self rising flour, about 1/2 cup sugar, and enough milk to make it thick, like pancake batter. I used my Nido powdered whole milk for this step and just put about 3 tablespoons of the powder in with the other dry ingredients. Then I added water and stirred till it was the consistency I wanted.
I poured the batter into the melted butter in the baking dish.
Then I poured in the macerated blackberries, trying to get an even layer to within about an inch of all edges of the pan.
I baked it in my Coleman stove top oven at about 325F (it could be baked at 400F in a conventional oven) until the sides and bottom were golden brown and a knife inserted in the center came out clean. It took about an hour in the Coleman oven.
After letting it cool about 30 minutes (this was the hardest part, just letting it sit there!), I mixed up some whipped topping using 2/3 cup whipped topping powder and 2/3 cup cold milk made from the Nido powdered milk. Dolloped generous portions of the whipped topping onto the cobbler serving in a bowl, and we had fresh homemade blackberry cobbler!
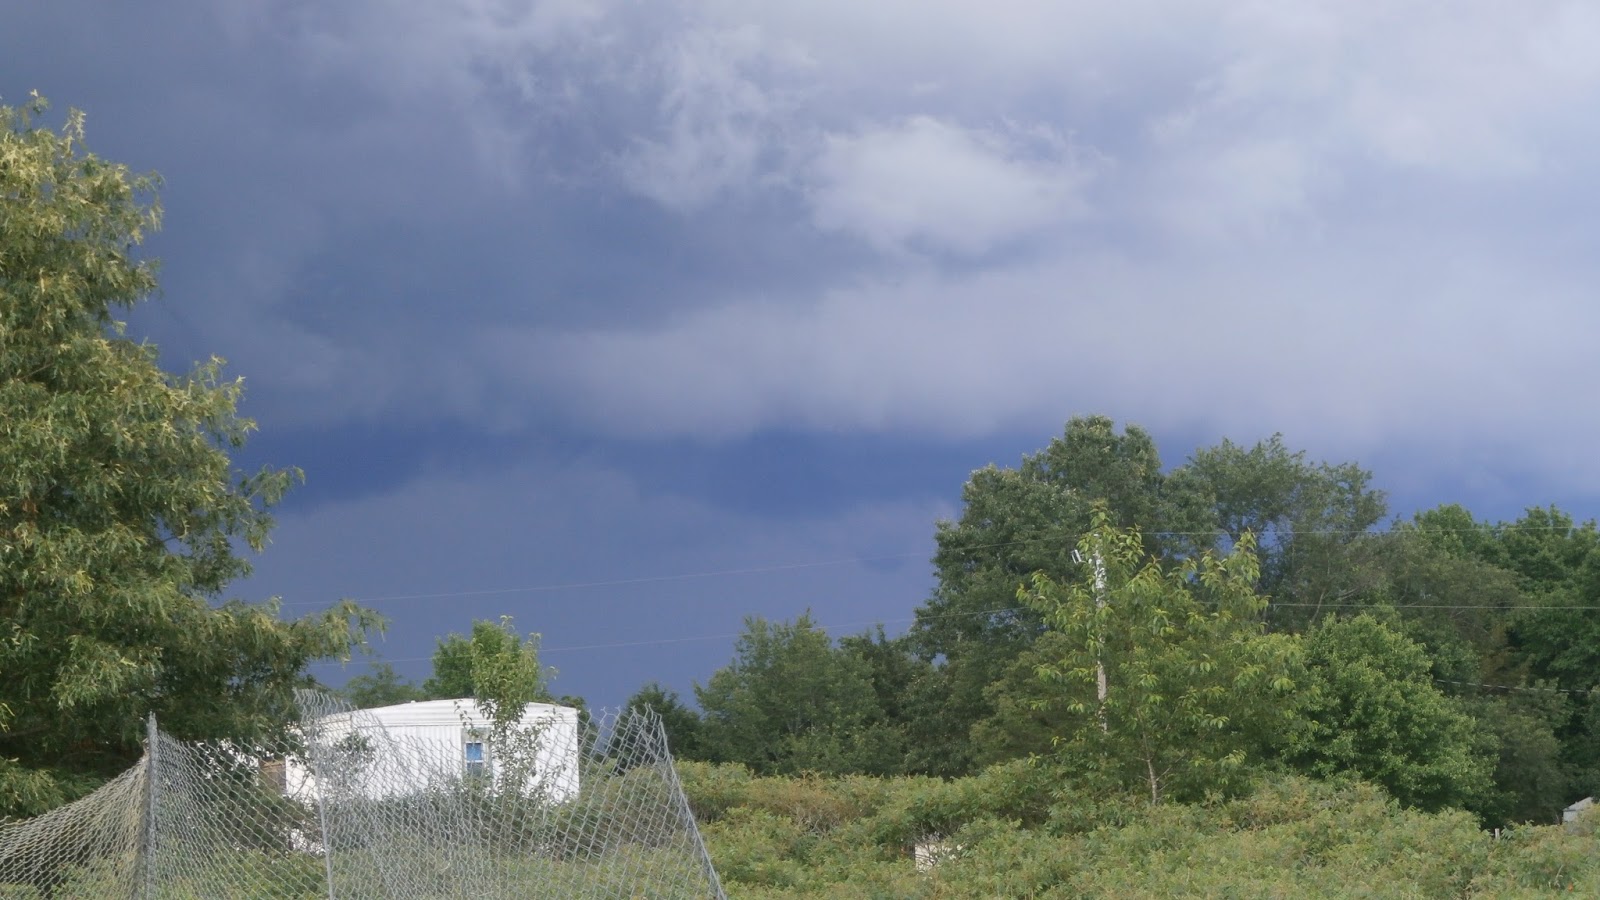
We have wondered if the extra rain, cooler weather, and frequent rain and thunderstorms mean anything bad is happening climate-wise. To be honest, I don’t think so. I’ll explain.
When I was growing up, we didn’t have air conditioning at all at home. We were able to play outside or garden or do any number of things with very little heat stress. We got almost daily rains for most of the spring and well into summer. It wasn’t until August that we really suffered any from the heat, and even then the nights were pleasant.
I can even remember when I was in high school and was in the high school rodeos and other local rodeos and horse shows that the nights in July were cool enough that I could see my breath. Does anyone else remember those days? This would have been in the late 60s and early 70s. I was born in ‘52, so I guess it even includes the 1950s.
Yes, there were tornadoes, hail, and all the things you associate with spring weather across the South. We didn’t attribute it to climate change, global warming, or any of the other catch phrases people use these days. It was simply the cyclical pattern of weather that’s been around for millennia.
We were more concerned about Cuba and Russia (then, the USSR) than we were the regular weather events which occurred year after year. Those were tense times for our nation, and for our family.
Now it seems the weather has cycled back again to what I remember those many years ago. Cooler nights, warm, humid days, and plenty of rain and dew fall to keep plants from expiring.
There’s been a lot of flooding this spring, but there was flooding in the past, as well. In the 1980s, the river near us flooded all the way out into the bean fields and washed away the Corps of Engineers park near the lock and dam. In the 1990s, more floods filled valleys where small towns had sprung up far back in the past. Rivers and streams again overflowed their banks.
I really think these weather patterns do occur in cycles. This year just happens to be a wet cycle. I’m not complaining, though. It’s good for the gardens. It’s good for the pastures. And, it’s good for the aquifer that feeds my well.
I’m not complaining at all. Nope. I welcome this weather. It came on the heels of a particularly mild winter, which is one reason why I love where I live. Our average annual temperature is in the 50s. Right now we’re experiencing daytime highs in the 80s and overnight lows in the 60s. That’s not bad at all. We will get some days of blistering heat in August. Maybe even a few of them in July. Conversely, we may even get a few days of snow or ice storms that knock out power in the winter. But we’ve survived them in the past and I’m sure we’ll survive them again.
Every few days I have just enough veggies from the garden to create a meal without adding much store bought stuff to it. This time it was used for making our own version of stir fry.
I picked and prepped some fresh carrots, sugar pod peas, shallots (green onions), and a couple of leaves from my horseradish plant. I cut the center ribs out of the horseradish leaves because it's quite tough and woody. The leaves are very mild once cooked. I matchstick-cut the carrots after scrubbing them. I angle-cut the peas and green onions. And I ribbon-cut the horseradish leaves.
I put a couple of tablespoons of olive oil in a skillet, since I don't have a wok, and lightly sauteed the veggies.
I added some of my home canned pork along with the broth from it.
I also added a few tablespoons of home canned mango jam and a couple of my farm fresh eggs. I thickened the sauce part with just about a tablespoon of cornstarch.
I added a few splashes of soy sauce then cooked it all together till the eggs were done.
Served the stir fry over rice to round out the meal.
I hope you make this, too, or something similar. If you do, share what you did in comments. I'm always looking for cooking ideas!
It's getting really hot here, but the gardening continues! The potatoes either have blight now or they're just plain ready to be dug. The plants are dying back. Once they're out of the garden I'll come behind them and plant other things -- beans, turnips, maybe onion seeds. Got to keep it all going and growing!
Come along with me as I make my own version of pineapple jam, or pineapple preserves. Pineapples were 96 cents each at a local grocery store. Next time I find them on sale, I'll just make regular canned pineapples. :)
Hey everybody! I tried something new-to-me recently: Pork roast in a jar. Now, this recipe originally called for beef, but what I had on hand was pork. Since meats all can for the same time, I just dived right in!
In this video, I share how I followed the recipe from the All New Ball Book of Canning and Preserving (which I'm loving more all the time) to make a meal in a jar that we can use when we want. Just open it up, heat it up, and use the broth to make gravy and you're all set!
I normally water bath can tomatoes but since I thought I'd need to double stack my pints plus I wanted to use less water, I pressure canned this batch.
I certainly hope so! I’ve begun my gardens on my new homestead. Not a lot planted yet, but the ground is broken in some places and a few early crops have been planted.
I’ve also put seeds in starter trays in my portable greenhouse. They haven’t sprouted yet. I always get nervous until I see the first baby green leaves coming out of the soil! I put lettuce, two kinds of tomatoes, spaghetti squash, cucumbers, watermelon, and pie pumpkin seeds in them. I do still have some of all of these seeds left if it turns out I need to replant them.
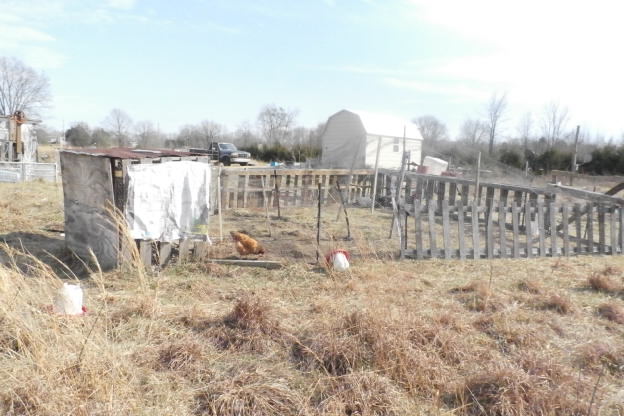
We built a new chicken run to attach to the previous small one. This will keep the chickens from eating the seeds and tender new plants in the garden areas. We’ve tilled up a very nice spot for potatoes, and will continue tilling other locations for more gardens.
I was able to move 3 of my old raised beds to the new homestead, so I’ve started them over again as well. I put cardboard on the ground under them to block weeds. (Most of the grass here is fescue or bermuda grass.) I put a mixture of topsoil, peat humus, and composted manure into one bed to get a bit quicker start on it. I hope I can dig up other soil from the property, but I needed a “quick fix” for this first bed. In it, I planted some green peas, mixed lettuce, and mixed radishes. I didn’t fill the bed with these veggies, so I’ve got room to add a few other things to it.
We’ve been getting the goats out and putting them on tethers to eat down the proposed garden areas. It works out very well all around. I get a cleared garden spot with bonus fertilizer and they get full tummies of grass.
The small tiller, various garden tools, and fertilizers and soils were all from my late brother-in-law’s collection of garden tools and amendments. Sis let me have them since she doesn’t garden. (In her words, “I don’t garden and you can’t make me!” lol) Her late husband was a Master Gardener and wound up with a large array of tools, books, and soils/fertilizers.
As we tilled the proposed potato patch, we also dug out the larger clumps of fescue grass. While fescue is excellent for pastures (where we live, it will grow even in the winter), it clumps up pretty big as it grows, sometimes making walking over the field difficult due to stumbling! Those clumps, some large enough to fill a 2 gallon bucket, are being tossed over into the pig pen and chicken yard where the pigs and chickens are enjoying eating them, rooting in them, and scratching them apart.
Along with veggies, of course, there will be flowers. I was very pleased to find that some previous resident had planted loads of daffodills in the past, but they were in a very unlikely location – in the center of a bunch of privet hedges! So, we’ve been busy digging them out and moving them to places where we can enjoy them much more, such as a row of them in front of the cabin. There’s still more to move, but I have planned where I want them around the perimeter of the yard, to define it.
I also brought my daylilies, regular lilies, violets, irises, and butterfly weed with me and got all those planted out in a bed at the front edge of the front yard. All these flowers are beautiful and pretty well native varieties, but the daylilies and violets are also edible! Along with these I moved things like monkey grass and purple wood sorrel, which are still in pots but will be planted over the next few days.
None of my herbs except rosemary survived the move, and even the rosemary is looking pretty sick. The buck goat we had got loose and had a “fight” with it, knocking it down, scruffing it badly, and even breaking some branches off. I’m hoping it make a strong comeback this summer. Last summer and fall, it did seem to be growing.
I also brought over the Jerusalem Artichokes, and we recently added some, fried up like fried potatoes, to a meal. They were excellent so I hope they really do well. I want to try pickling them and also making relish from them! They never did bloom last fall so I’ll leave the rest of them alone to see if they take off again. I had uprooted them for the move last summer after they’d already started growing, so that set them back a lot.
Now, tell me what you’re doing or planning for this spring!
What a roller coaster ride the weather has been. We had temperatures in the 70s, then we had days of snow. Overnight lows went down to about 10 on a couple of nights, now it’s back up to the 60s again.
A friend in the weather business said we should watch for flash flooding for the next few days, while those in the north part of the state could see ice and snow!
We did finally get a propane heater installed and it helps, but without insulation, it’s not a huge help. At least we weren’t freezing during the first round of low temps for the year. However, we ran out of propane last Saturday night, just in time for the next round, and couldn’t get the tank filled on Sunday.
See, we normally take the tanks to a local hardware store where they have a bulk tank to refill from. We did trade in our smaller tank (a grill tank) for one like it at a local grocery store. However, I don’t think there’s as much propane in those you see in the racks outside of stores as what we get when we get one refilled. And, the cost is considerably higher. But we needed something to at least be able to cook on those really frigid days.
I’ve sold a couple of things to keep propane in the heater and stove. The money will also help keep a generator running. Oh, I forgot to tell you the generator news, but I’ll do that in another blog post.
Anyway, I have a turkey to can and now we’re not having enough sunlight to charge the well pump battery. (I need the water for inside the canner and to make broth for canning.) This just means we’ll need to charge it up from the truck, so I can pump water and get some canning done before it all goes bad.
I did get some veggies canned that were on sale very cheap at the local grocery store, at least, so now we have a little more variety on the plate. Canning them got us 5 pints of corn, 3 pints of green peas, and 10 pints of green beans for an average of 40-cents per pint. Less than the cost of buying these same vegetables in cans.
Sorry it’s been so long since I posted here. It seems like one thing after another has happened. Nothing terrible; just stuff.